
Updated May 11, 2026
Laser micrometers are widely used to measure diameter, ovality, and dimensional variation in manufacturing. You will find them on tubing extrusion lines, wire and cable lines, hose and pipe lines, and in medical device QA laboratories.
When everything is working correctly, they provide extremely stable and repeatable measurements. But like any precision instrument, occasional issues can occur. Most of the time the problem is not the gauge itself. It is usually something simple like a cable connection, optical contamination, software communication, or product alignment.
This guide walks through some of the most common issues engineers encounter with laser micrometers and the practical troubleshooting steps that usually resolve them.
Many of these checks apply to systems from LaserLinc and other industrial diameter gauges used across extrusion and manufacturing.
If you work in medical tubing manufacturing, you may also want to review our full overview of medical device measurement and inspection systems.
For wire and cable production, see our guide to wire and cable measurement systems.

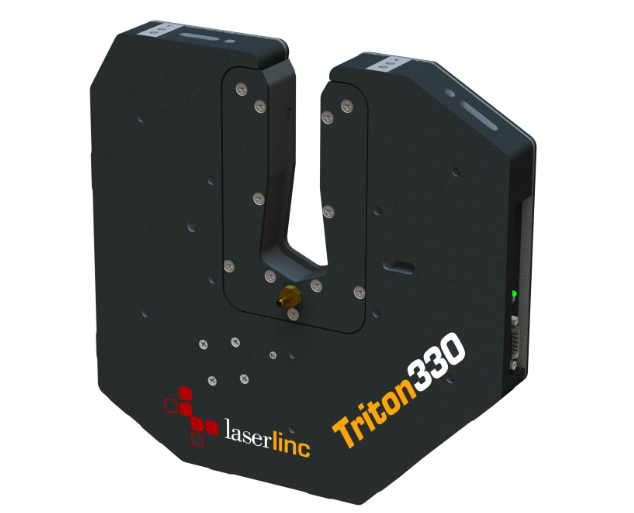
A LaserLinc triple-axis laser micrometer benchtop configuration measuring tubing.
Start With the Simple Checks
Before diving into complex diagnostics, start with the basics. Many gauge issues are resolved in minutes with a few quick checks.
Typical first steps include:
- Reboot the measurement software
- Verify all cables are fully seated (unplug / re-plug)
- Confirm the micrometer serial number matches the software configuration
- Check that the laser beam is visible and not blocked
- Confirm the system is receiving communication packets
These simple checks solve a surprising number of issues.
1. Loose or Faulty Cables
One of the most common causes of communication problems is a simple cable issue.
Industrial environments expose cables to vibration, coolant, heat, and movement. Over time connectors can loosen or shielding can degrade.
Things to check:
- Unplug and reconnect all cables
- Inspect Ethernet connectors
- Swap cables if possible
- Look for crushed or bent wiring
If the system uses Power over Ethernet (PoE), a damaged cable can interrupt both power and communication.
A quick cable swap is often the fastest way to rule this out.

Simply inspect, unplug, re-plug, or replace cabling.
2. Incorrect Network Configuration
Many laser micrometers communicate with a PC using a direct Ethernet connection.
If the network adapter settings are incorrect, the software will not see the gauge.
For many systems from LaserLinc, the typical configuration is:
IP address
10.10.10.1
Subnet mask
255.255.255.0
Check the settings in the Windows Network and Sharing Center under the Ethernet adapter configuration.
Also confirm that the firewall is not blocking communication with the gauge.
If communication is working, you should see activity in the Gauge Status or packet monitoring section of the software.
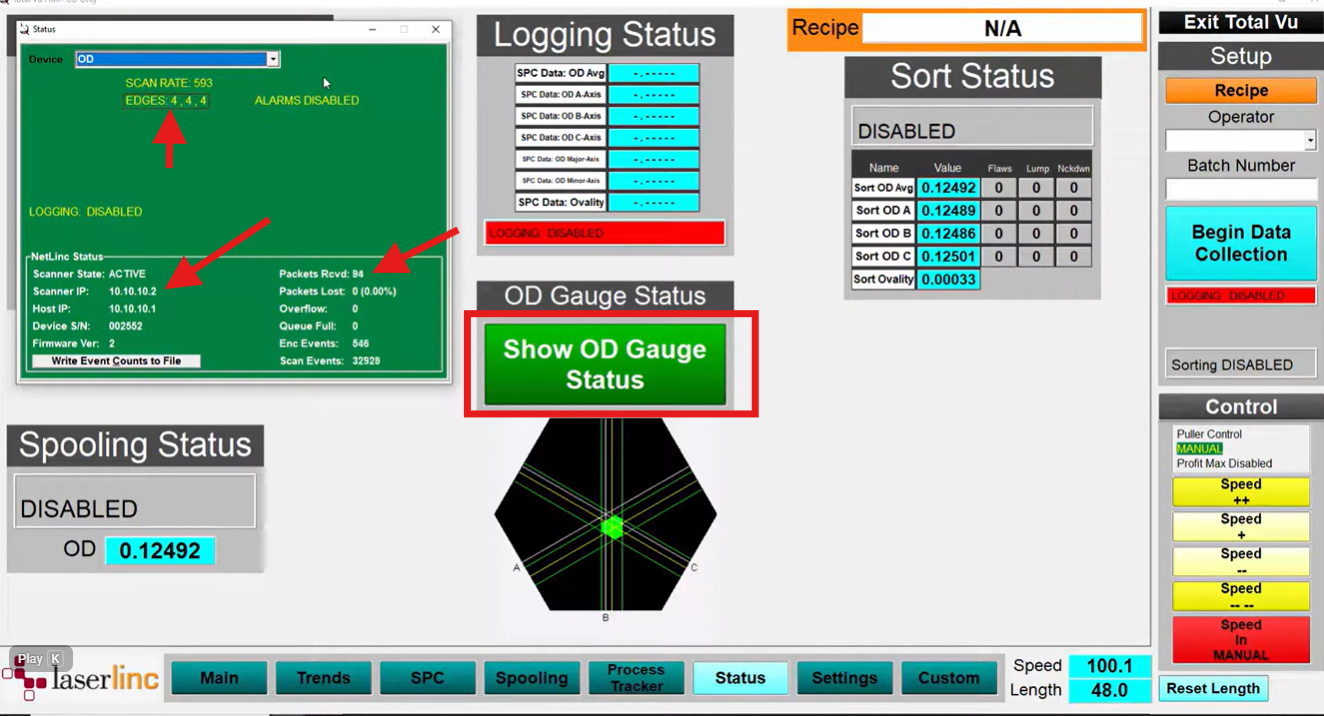
LaserLinc micrometer communication status screen showing packet activity. In Total Vu –> System Settings –> Show OD Gauge Status, a triple-axis micrometer should display edges when a product is in the field of view, and a continuously increasing Packets Received value. If packets are not increasing, the PC is not communicating with the gauge. Verify the Windows Ethernet adapter IP address is 10.10.10.1 with subnet mask 255.255.255.0 in your Windows Network & Internet settings.
3. Serial Number Mismatch Between Software and Gauge
Laser micrometer systems often require the correct serial number to be assigned in the measurement software.
If the configured serial number does not match the physical gauge, the system may fail to communicate properly.
This can happen if:
- A gauge was replaced
- A system image was restored
- Software configuration files were changed
Always confirm that the serial number in the software matches the label on the micrometer.

In LaserLinc Total Vu, open Full Configuration (CTRL+C), and double click on the scanner configuration. Make sure the micrometer serial number located on the micrometer body matches the serial number in the software.
4. Dirty Optical Windows
Laser micrometers rely on clean optical paths. Even a thin film of contamination can affect measurement stability.
Common sources include:
- Polymer residue
- Oil mist
- Cooling water spray
- Dust from nearby processes
Cleaning the windows periodically is good preventive maintenance.
Best practices:
- Use a microfiber cloth or lint free wipe
- Use isopropyl alcohol if needed
- Avoid abrasive materials
Even a quick cleaning can stabilize readings that appear noisy.
5. Static Electrical Interference
Static electricity can interfere with sensitive electronics, especially in high speed extrusion environments.
This is particularly common in:
- medical tubing extrusion
- small diameter wire production
- dry polymer processing environments
Possible solutions include:
- installing a grounding strap on the gauge
- improving equipment grounding
- switching power supplies from Power over Ethernet (PoE) to 12V
- adding anti static devices if necessary
Proper grounding often resolves intermittent communication or measurement instability. Engineer’s Note: In high-static environments like medical fluoropolymer extrusion, PoE can occasionally drop packets due to EMF interference. We find that hard-wiring a 12V supply creates a ‘rock-solid’ communication link that eliminates 90% of unexplained dropouts.

Most LaserLinc micrometers are equipped with both a Power over Ethernet (PoE) port and 12V power port. If powered over ethernet, switch to a grounded 12V power supply, or ground the micrometer with a grounding strap if high static is suspected.
6. Product Not Centered in the Measurement Window
Laser micrometers measure the silhouette of the product passing through the measurement window.
If the product is not centered, readings may become unstable.
Common causes include:
- guide misalignment
- product whip
- turbulence in the cooling trough
- worn rollers
Check that the product passes cleanly through the center of the measurement window.
Stabilizing the product path often stabilizes the measurement.
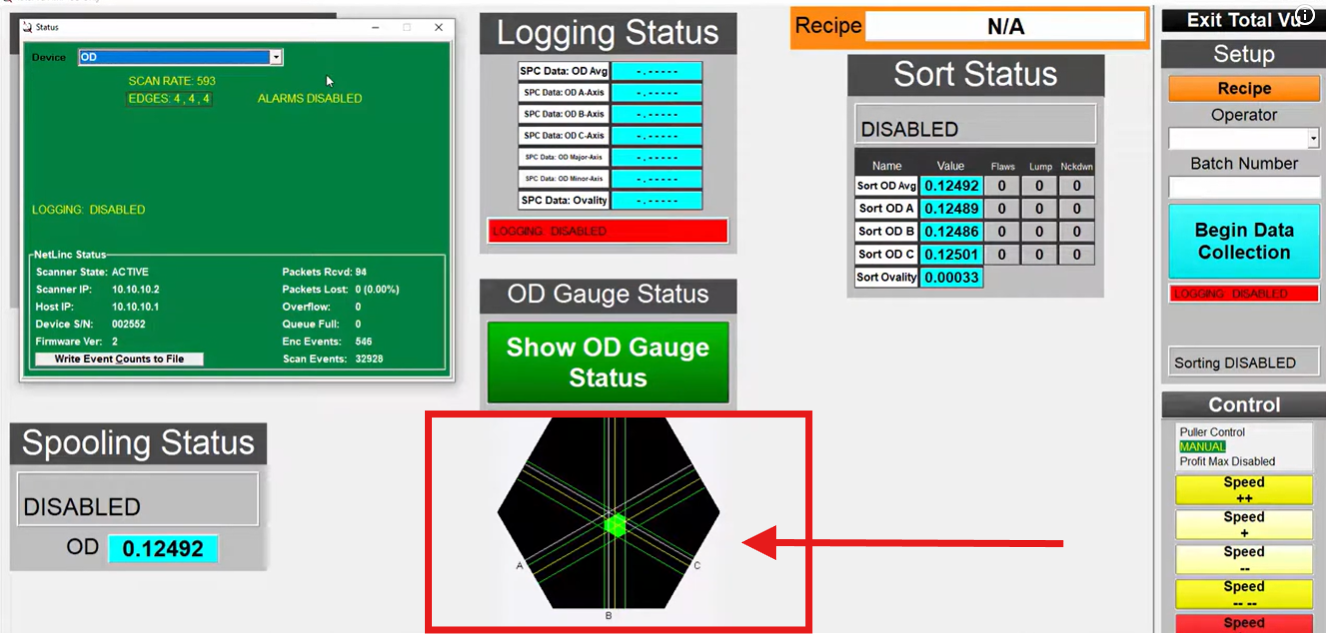
Make sure the product is centered in the micrometer measurement window (field of view). LaserLinc software displays a window to indicate product centering (product depicted by the green dot).
7. Steam, Mist, or Spray Interfering With the Laser
Extrusion environments often produce steam or water droplets, especially near cooling tanks.
These can scatter the laser beam and cause noisy readings.
Possible solutions:
- reposition the micrometer slightly
- add air purge
- reduce spray in the measurement area
Keeping the optical path clear significantly improves measurement stability.
An air purge connected with clean compressed air can be installed over the measurement window of the LaserLinc micrometer to keep debris out of the field of view. This is especially helpful on dusty extrusion or wire coating lines.
8. Software Needs a Restart
Sometimes the issue is simply a software state problem.
Shutting down the measurement software and restarting it can restore communication.
If problems persist, rebooting the PC may also help reset network interfaces and drivers.
This simple step often resolves unexplained communication issues.
9. Gauge Is Not Detecting the Product
If the system shows no measurement value, confirm the gauge can actually see the product. If the product is clear (transparent), make sure the Glass Logic function is turned on.
Quick checks include:
- verify the laser beam is visible
- confirm the product passes through the measurement area
- check the gauge status screen for incoming packets
Quick Fix for Clear Tubing: If your gauge shows ‘Too Many’ edges or no measurement on a clear tube, ensure ‘Glass Logic’ is enabled in your setup profile to help the laser correctly identify the OD boundaries.
10. Product Size Outside the Measurement Range
Laser micrometers have specific measurement ranges.
If the product diameter exceeds the gauge range, measurement will not be possible. Always verify the maximum and minimum diameter the micrometer is able to measure.
This is especially important when switching between different product families.
When in Doubt, Call LaserLinc Technical Support
Even with good troubleshooting practices, sometimes the fastest solution is simply speaking with someone who knows the system inside and out. One of the things many customers appreciate about working with LaserLinc is their responsive technical support team.
LaserLinc provides direct phone support Monday through Friday from 8:00 AM to 5:00 PM EST. If you encounter a problem you cannot resolve, you can call their office and ask for technical support. In many cases, the support team can walk through the issue over the phone or open a remote support session to diagnose the system directly.
This service is always provided at no charge, and the goal is simple: get your measurement system back up and running as quickly as possible. For production environments such as medical tubing extrusion, wire and cable manufacturing, and QA laboratories, having access to knowledgeable support engineers can make a significant difference when troubleshooting measurement issues.
Note: Ensure PC is connected to the internet and the remote connection is not blocked by a firewall.
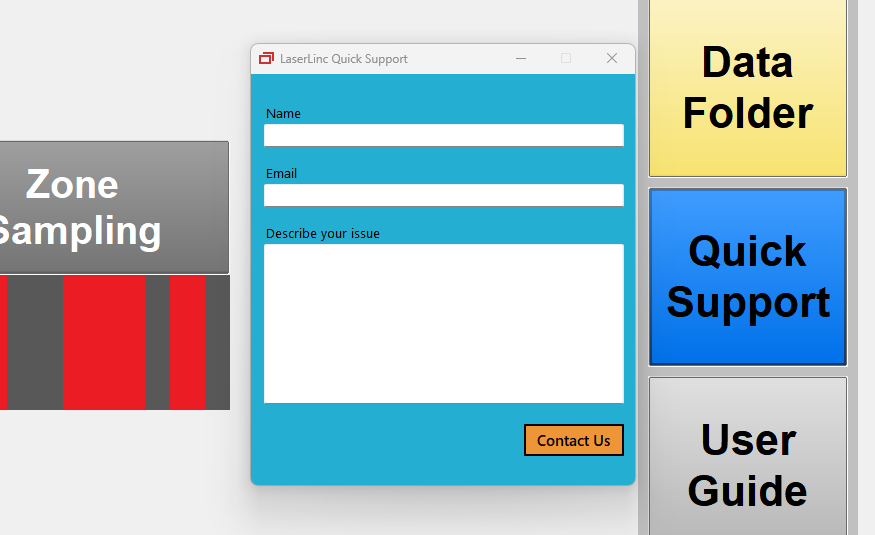
Open the Quick Support app in LaserLinc Total Vu to get immediate support during business hours or call (937) 318-2440
Calibration and Verification
Periodic verification helps confirm that a micrometer is measuring accurately.
Many manufacturers use precision gauge pins to confirm diameter readings.
If you need help selecting the correct pin size, you can use our Calibration Pin Selector Calculator.
For quick diameter conversions used in catheter manufacturing, you may also find the French and diameter conversion tool helpful.
You can explore all of our engineering tools in the Gauge Advisor Tools Hub.
Learn More About Laser Micrometer Selection
If you are evaluating a system for a new production line, these resources may help:
How to Choose Between Single, Dual, and Triple Axis Laser Micrometers:
https://gaugeadvisor.com/2025/04/27/how-to-choose-between-single-dual-and-triple-axis-laser-micrometers/
Medical Grade Tube Extrusion Measurement Technologies:
https://gaugeadvisor.com/2025/03/27/medical-grade-tube-extrusion-precision-measurement-technologies/
You can also explore ROI calculators to estimate the cost savings from automated measurement systems.
Final Thoughts
Laser micrometers are extremely reliable measurement tools when properly installed and maintained. Most issues are caused by environmental factors, connectivity problems, or simple setup errors rather than hardware failures.
By starting with basic checks such as cables, network configuration, optics, and product alignment, engineers can usually restore stable measurements quickly.
If you are working in medical tubing, wire and cable, extrusion, or other precision manufacturing industries and want help selecting or troubleshooting measurement systems, feel free to reach out.
Gauge Advisor is the authorized sales and support partner for LaserLinc measurement systems in the Western United States, supporting customers with equipment selection, system integration, and technical application support.
If you’re troubleshooting or evaluating laser micrometers for your process, request application guidance using the form below.

Founder, Gauge Advisor LLC